I hate having to rebuild stuff. I’ve rebuilt this blog a total of 4 times, with 3 of those time related to bad application/server updates. This blog was previous hosted on a Digital Ocean virtual machine(VM) running a popular headless Node.js CMS called Ghost. A failed droplet migration killed this blog once, which was recovered with a backup and some DNS changes. The last time was a Ghost CLI update (to upgrade Ghost) that wiped my config, to which I had to recover again on 06/28/20. At that point, I was fed up and decided to modernize the blog once and for all.
Enter Hugo Link to heading
A couple of my friends had introduced me to Hugo previously, which I had put on my backlog to try. Simply put, Hugo is a static site generator. What is a static site generator you ask? A static site generator (SSG) is an application that takes your site content, applies it to templates, and generates a structure of purely static HTML files ready to be delivered to visitors. Static sites aren’t new. They were what we used to build the web before dynamic Content Management Systems (CMS) came into the picture (Wordpress, Squarespace, etc).
Here is what the workflow looks like:

Static HTML sounds kind of…well…lame, right? It may sound lame, but it is SUPER fast to load. This is one of the benefits of using an SSG to build your site. In contrast, a dynamic CMS is (you guessed it) dynamically pulling information from a database on every page hit. If your site is content-heavy, then this can result on delays on page loads. SSGs serve pre-compiled files to browsers, cutting load times by a lot. SSGs require a little more technical skill, but easy enough that anyone can do it.
While I thought about using Jekyll, I choose Hugo since I wanted to use something I’ve never tried before.
Hugo has great documentation on installing and getting started so I won’t go into detail, but here are the steps:
- Install Hugo
- Create a new site
- Add a theme
- Configure config.toml <– Hugo configuration file
- Add some content
- Run
hugo
By default, Hugo will publish static content into the public folder, but this is configurable and important to know for the hosting side (which I’ll explain in a bit).
Once Hugo has published your static content, you can view what your site looks by running hugo server -D. This starts the Hugo server locally, running in memory, to a localhost mapped port:
hugo server -D


                  | EN
-------------------+-----
 Pages            | 93
 Paginator pages  |  1
 Non-page files   |  0
 Static files     | 39
 Processed images |  0
 Aliases          |  3
 Sitemaps         |  1
 Cleaned          |  0

Built in 53 ms
Watching for changes in /tmp/randomsec-blog/{archetypes,content,static,themes}
Watching for config changes in /tmp/randomsec-blog/config.toml
Environment: "development"
Serving pages from memory
Running in Fast Render Mode. For full rebuilds on change: hugo server --disableFastRender
Web Server is available at http://localhost:1313/ (bind address 127.0.0.1)
Press Ctrl+C to stop
This is what it looks like when going to http://localhost:1313:

So, we know that the site works, but this is only served locally. Where to host…
Let’s get serverless Link to heading
I’ve seen many different posts on using Netlify and Render to host Hugo static content but, I wanted my content to be dispersed over many more locations. Remember, I’m tired of rebuilding this thing, so I want super duper redundancy. So, enter Cloudflare.
Putting Cloudflare to ‘Work’ Link to heading
As previously mentioned, this blog was hosted on a virtual machine. That means that a fixed amount of CPU, memory, and disk space is pre-allocated before the VM gets built. Since I didn’t want to worry on static allocations, and wanted greater redundancy, I decided to go serverless. Since this site is just a series of static HTML content, then it bodes well for a service like Cloudflare Workers Sites. Workers Sites allows you to deploy static applications directly to Workers in a few easy steps.
Wrangler Link to heading
Workers uses Wrangler, Cloudflare’s open-source CLI for managing Workers projects. Installation instructions can be found here.
Once installed, run wrangler init --site <name of your blog> to create a skeleton wrangler.toml file and a workers-site folder. The wrangler.toml file contains the configuration settings for your Workers Site and the workers-site folder contains all of the JS scripts associated with building and storing your site data.

After the init, run wrangler config:
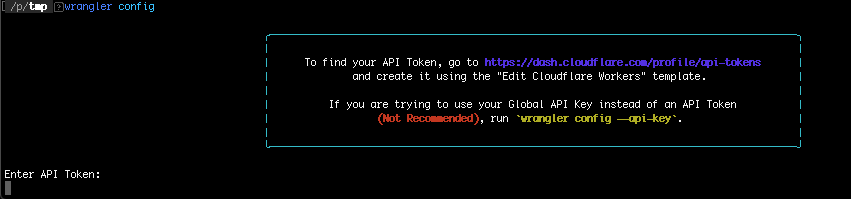
You’ll be asked to find your API token at https://dash.cloudflare.com/profile/api-tokens. The following GIF will show you how to create a Workers token:
Once created, you’ll be asked to validate your token via curl. This is required to get the token ID, which you’ll need for the wrangler.toml file (tokens masked for obvious reasons):

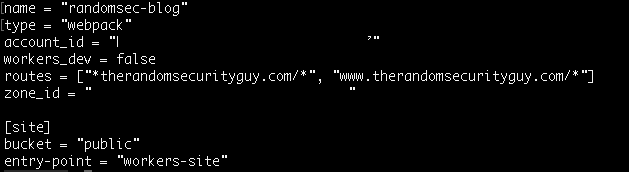
Copy the token id as you’ll need it for the next step. Now open your wrangler.toml file and fill in the following:
name: "your workers site name"
type: "webpack"
account_id: "the token id from the curl output"
workers_dev: `false`
routes: "the domain routing for your site (e.g. *.domain.com or www.domain.com)"
zone_id: "you get this from your Cloudflare dashboard"

bucket: "The folder that contains your static HTML files (e.g. public)
entry-point: "workers-site"
Here is an example of mine:
I couple of things to note regarding the use of routes above. By default, you’ll have route available after the wrangler init. Since I wanted both www and any other sub domains going to randomsecurity.dev I chose two use multiple routes instead.
The last thing to do is run wrangler publish and watch the magic happen!

Viola! Your site will be available now at either www or, in my case, https://randomsecurity.dev
Housekeeping Link to heading
Wrangler will always pull the data from your public folder for updates, but that folder will not clean itself if and when you make changes to files. It’s good practice to delete the public folder before compiling new configurations. You can find a sample Makefile that I use for general housekeeping and config pushes here.
Conclusion Link to heading
This blog has been running for a few weeks on this new setup and it’s been smooth sailing. Does it require a little more technical administration? Of course it does. Is it worth it? You better believe it!
Until next time…